It has been a while since I wrote an article on e-book conversion to Amazon Kindle and I decided to do another one having had a few questions on this subject. First up you will need an account on Kindle Direct Publishing so go set one up. There is another article here about that.
The Easy Way
Smashwords.com is a US based E-book retailer. It is possible to upload your e-books to them and they will convert to all the various e-book formats including phone apps. They will distribute to Apple, Sony, Kobo and Amazon. So if you want to use this route, it is the easy way in. I recommend it.
Smashwords have a Style Guide. If you are converting ebooks  then I suggest you download and print off the Style Guide.
Work through the guide with your book open on a screen and the Style Guide next to the PC. If you follow the guide to the letter you really can’t go far wrong.
Then when you have the word doc ready to upload to Smashwords you will find that SAME document is basically ready  (almost) for uploading to Kindle. However there are a few tweaks you still need to make.
What follows is a walk through of starting from your original manuscript, processing it as per the main parts of the Smashwords Style Guide and then the final preparation of the Kindle File. If you are following the smash words guide you can skip to OK lets get the Kindle File Ready (The KDP issue) (although you may still need to add in a table of contents if you want)
What I have here is the process I follow when making a kindle file.
Horses for courses
The first thing you must realise is that your carefully laid out manuscript that you prepared for your paperback version (assuming here that you are self published), is basically far from ready for e-book conversion. The paperback will have fixed page sizes, margins and page numbers. E-books have none of that. IN an e-book reader – YOU THE READER – determine font sizes, lines per page etc and so the file must be formatted without anything which will muck that up. Likewise blank pages are hated by e-book readers and you need to remove these. Gaps between lines are an anathema and even double or more spaces between words dont go down well.
Word contains all sort of hidden codes that can make a mess of your ebook. Thus we are going to have to do some work to get it ready.
Why not use a Pdf I hear you ask. Well you might be lucky. Amazon Kindle WILL accept a Pdf BUT it is a lottery as to how they turn out and usually are horrible when converted.
He’s got style
Firstly I create a empty book which I am going to make sure has the right styles set up. Word often contains ODD formatting in its styles. Styles are applied to word as you type. If you do nothing the NORMAL style template is applied. It is best if this style is basic. BY basic I suggest you set it to Times New Roman and font size 12. You want to remove all funny fonts from this ebook. Styles are accessed from top right of word. Right click Normal … modify and then change the set up. Save as “myebook.doc” BUT NOT DOCX.
Rip it up and Start Again
What I do when converting e-books is to start from totally plain text. So I open up the word doc of my finished paperback document.
TWO choices:
1. You can save the doc as a plain text txt file, close it down and then reopen it.
OR
2. What I prefer to do is SELECT ALL (CTRL-A) and COPY (CTRL-C) and then paste it into NOTEPAD. Notepad only handle plain text.
So now with a wimper I have destroyed ALL my formatting. I then PASTE the plain text into “myebook.doc” which I earlier set up.
Hopefully you will have a document formatted to Font size 12 Times New Roman.
It should not have any page numbers and should be standard A4 size or US letter size.
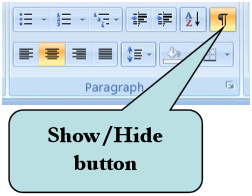
The Show/Hide Icon- your helper
This icon is something that authors should be familiar with. You use it to show the hidden little symbols that show where you have spaces, new paragraphs etc. Having it selected when formatting your e-book should be routine.
DONT TOUCH THAT TAB BUTTON
OK we are about to tidy up our ebook. One thing to remember is NEVER use the tab key. It has NO ROLE in ebook formatting.
When you start a new paragraph in an ebook you have a choice of two methods. ADD an extra line (I will come to that) OR use the ruler to control the indent.
Keep an eye on the ruler
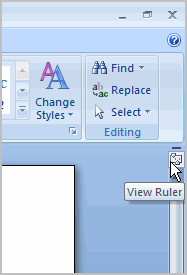
I use the ruler tool in word a lot. You can make it vissible by an icon on the RT side of the programme.
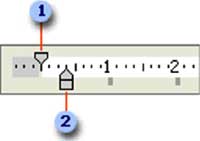
When running it shows you 1) Where the margins are set (used in the paperback) and 2) The current indent for new paragraphs. You can drag the little triangles to the relevant locations.
So when I have my ebook open I CTRL-A to selecet it all and then drag the number 2 triangle accross a few characters to create the same indent for teh whole book.
Then as we go through we can always modify the indent for specific locations.
OK Lets work through this document
Before we start I will select all and makse sure it is LEFT+RIGHT justified. So we now have a WORD doc formatted to Times New Roman font 12 with an indent at the start of each paragraph. Â We now work through it formatting as we go.
Front Matter
I usually highlight all the front matter and CENTRE Justify it. I might reduce the Font side to 10 or 11 for the “small print and copyright stuff”. Make sure all the website links to Author Pages, Publishers and anyone else have a hyper link set up by selecting it and clicking insert hyperlink.
At the end of each Page of the Front Matter I insert a page break after the very last line. This will mean that Kindle will start each part of your front matter on a new page. So I have:
Title Page / page break
Copyright page/page break
Dedication/ page break
Author page/ page break
etc etc.
Spaces between lines
Do you notice that I had a larger gap between some lines in those pages? How did I do that? Well I DID NOT do it by just hitting the enter key. You should NEVER add an extra line that way.
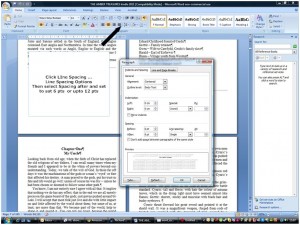
Use the Line Spacing icon from the home screen. Make sure the cursor is flashing at the end of the line you want to add extra space afterwards. Choose line spacing options and then set the AFTER setting to say 6 or 12 pts. This will now leave a larger space before the next line.
Table of Contents
In a non fiction book you will want a table of contents. In a fiction book you MIGHT want one. It is not essential. If you decide to put it in have a page with somthing like:
Table of Contents
Chapter 1
Chapter 2
Chapter 3
etc
I will tell you how to link this in later.
Formatting the body of the Text
We now move onto chapter 1. The chapter heading should be selected, justified centre and the indent removed (drag the triangle number 2 so it matches triangle number 1). I usually change the heading to Font 14 and Bold. I usually add an extra line after the title using the method I mentioned before.
Finally I remove the indent at the start of the text itself as the start of a chapter or section should not have an indent.
The body of each chapter should be nicely formatted now but you may wish to add extra space at the start of a section in the middle of a a chapter and to remove the indents.
Finishing the Table of Contents (TOC)
As you work through the book highlight each Chapter Heading and insert … bookmark. Call the bookmark Chapter 1 or whatever. When you have all the bookmarks in place go back to the TOC and highlight the line for chapter 1 and then insert hyperlink and choose the bookmark CHapter 1. Repeat until you have linked all chapters into the TOC.
Images
If you have images in the ebook when we converted to plain text they will have gone.
Before you add any images to the book it is best to format them to greyscale and resize them to a maximum of  500 wide by about 600 high so they fit on a screen.Go through the book adding them back in. Then highlight each image and select format picture … compress … web/ screen to Reduce File size of the final e-book file – which is best for fast loading etc.
OK lets get the Kindle File Ready (The KDP issue)
I assume you have set up an account on Kindle to upload to. Go to kdp.amazon.com if not and get one set up
With Kindle direct publishing you need really to upload a HTML file for best results.
If you just upload the Word doc NO IMAGES will show and all sorts of naff word code gets dragged in. So convert it to html first.
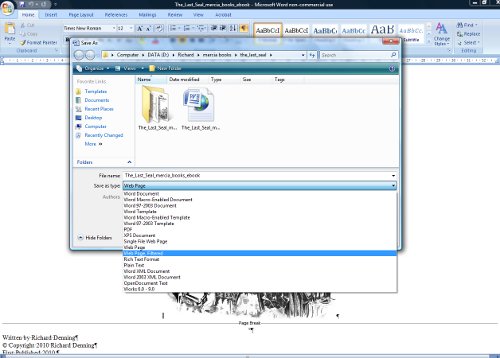
The best way to do this is to open Word and click file…save as.. webpage … web filtered
Doing this removes a lot of rubbish WORD code from your book. If you don’t do this you end up with a document for instance with spaces between each line throughout the entire book.
BUT when you save as a web page – as a HTML file – the images are stripped out and put in a folder which is referred to by the main HTML file. Â If you just upload THAT HTML file without the images folder you will find the images dont show up and all you get is little warning icons !!!
The Solution
The answer is to zip up the HTML file and the images and upload that to Kindle DP. This is how:
- Create a folder on your computer. Call it anything you like e.g. myebook.
- Open the word doc of you book (the one you have formatted for Smashwords and then edited ready for Kindle.)
- Save it as a web page filtered and save it INTO that empty folder you created in 1.
- Open the folder and you will find a HTML file called booktitle.html AND a subfolder called booktitle files.
- Take  look in that book title folder and you will see all the images from your book probably called image01.jpg etc
- What you do is now come out of everything then find that myebook folder. RIGHT CLICK on it and you will get  a list of options.
- One of the options is send to. If you select that you will get further options  one of which is send to compressed (zipped folder). Select this.
- You should now see a file called booktitle.zip in the same location the myebook folder was in.
- Its THAT zip file that you now upload to Kindle.
- When you have set up your book in Kindle DTP and you get to the bit asking for the book file use THAT zip file.
- To check all is ok open up the preview and you should see images in it. Go ahead and publish the e-book
- When the book is setup download the kindle book and check it out.
That’s it.
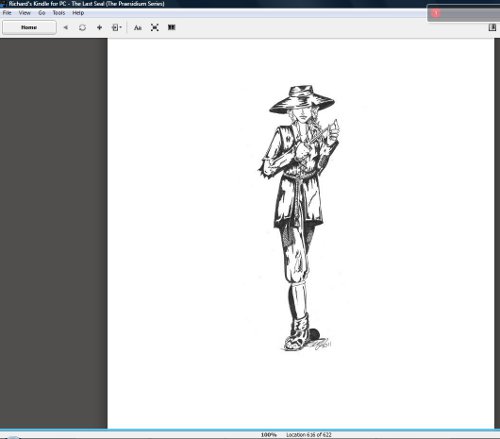
Assuming all goes well you should get a nice greyscale image on your kindle:
I recently followed this procedure to upload my new Kindle version of The Last Seal – my historical fantasy set in the Great Fire of London 1666.
Do me a favour and check out the FREE sample on Kindle.
http://www.amazon.co.uk/dp/B005CC4RSC
http://www.amazon.com/dp/B005CC4RSC





Related Articles
6 users responded in this post
[…] Richard's Ramblings » Post Topic » How to prepare a book for Kindle […]
TY richard for the clue on using MSword format. I have always had a contest with meatgrinder because it does not like MSword2010. We’ll see if the next upload does better with the .doc and not .docx
DOCX carries extra code with it that can cause issues. Certainly worth doing the doc version.
Richard, thank you for this very informative article. A question, however. How much to Smashwords charge for ebook publishing?
Thanks,
Keith
Smashwords does NOT charge for uploading the book. They take money from any sales you make.
Thanks, Richard, this looks very helpful.